
Maintaining a car is the best way to ensure you own it for a long time to come. And one of the most important tasks is to clean your car’s engine.
The engine bay of your car gets dirty from dust and debris that finds its way under the hood. A buildup of grease and grime on your engine parts will trap heat, thereby causing it to run hotter than usual.
In serious cases, too much grime on your engine may lead to overheating, which can pose a fire risk to you, especially if dry leaves and papers are stuck under the hood.
Grease, dirt, and grime in your engine will also accelerate the wear and tear of its individual parts, thereby shortening its lifespan. Keeping it clean allows you to enjoy your car for a long time.
Additionally, if you plan to sell your vehicle in the future, a clean, well-maintained car with a sparkling engine will attract a higher resale value. It will also enhance your driving experience.
How often should you clean your car’s engine?
You should clean your engine whenever it gets dirty. However, if you want to maintain a regular engine cleaning schedule, your driving habits and the roads you traverse will help you determine how often you clean it.
If you drive your vehicle mostly over dusty roads, of course, it will accumulate a lot of dust and grime. Therefore, you should clean it every three months.
However, if you drive your car over smooth, paved roads, it is unlikely to accumulate a lot of dirt. Therefore, you may clean it twice a year.
Maintaining your engine in this way will keep it in excellent condition for years to come.
Is soapy water good for your engine?
Cleaning an engine is daunting for anyone who’s never done it before because it is a sensitive part of a vehicle. And that is understandable. It’s easy to mess with your car’s electric system if you are unsure of what to do.
You may be tempted to douse your engine with warm, soapy water, thinking it’s a quicker and easier way to get rid of grease and grime, but that is also the fastest way to cause water damage.
Steam cleaning is also out of the question for the same reason. Invest in a good-quality engine cleaner for the job and do it by hand instead.
Choosing the right engine cleaner
Avoid harsh engine cleaners that contain acids or bleaching agents because they can degrade rubber seals and expose the metallic parts of your engine to rust or corrosion.
Solvent-based engine cleaners are better at cleaning out greasy dirt and grime than water-based ones. However, they attract dirt to an engine faster than water-based cleaners. They also have a strong smell and can be harmful to your eyes or lungs.
If you can withstand these drawbacks, use a solvent-based degreaser, but a better option is an eco-friendly water-based biodegradable engine cleaner that is gentler on your engine and will not harm the environment.
Engine cleaners or degreasers are not hard to use; you only need to read the instructions to avoid making mistakes. However, take care when using them because degreasers can strip away the clear coating of car paint.
How to clean your engine
You should clean your engine on a warm day when you are assured it will dry fast. Otherwise, if you do it on a wet day, you could end up dealing with water engine damage.
You will also find that working on your engine on a warm, sunny day is a much more pleasant experience than doing it on a cloudy, cold, or rainy day.
- Start by warming the engine for at least five minutes to loosen any grime, grease, or oil build-up. Then, wait for it to cool down before you start working on it.
- Disconnect and remove the car battery to protect it from water and cover the engine’s electrical components, such as the ignition wires, battery terminals, and engine computer, with plastic covers. If you prefer to clean your engine while the battery is intact, cover it with plastic too.
- Place absorbent mats under your car to collect the dirt and run-off from your engine, and start cleaning it by clearing any loose dirt and dust from it using a soft brush.
- Next, thoroughly spray the engine degreaser over the whole engine compartment from the bottom up, ensuring every inch is covered. You may apply two coats of degreaser if your car engine has too much grime. Work the degreaser in with a soft-bristled brush using gentle movements, ensuring it gets into every nook and cranny, especially hard-to-reach places. Leave it on for five minutes to ensure it penetrates any caked grime or grease.
- Use a garden hose or power washer to spray off the degreaser on a low setting. High-pressure water sprays may loosen parts of your engine or damage them; therefore, it’s best to use a gentle setting.
- Rinse off the degreaser from back to front, ensuring you get all of it. Avoid spraying water on any plastic-covered areas or nooks and crannies that are unlikely to dry easily. Use a microfiber cloth to wipe off these areas instead until they are spotless.
After giving your engine enough time to dry out, replace any parts you have removed, including the battery.
Then, apply protection spray to the engine to ease the next cleanup process and give it a nice shine. You may also apply an anti-corrosion liquid on the battery cables as you replace them to strengthen your electrical connection.
Lastly, peel off the plastic covers you used to secure the vulnerable parts of your engine, ensuring no drops of water get on them.
Leave the absorbent mats you had under the car in the sun for water to evaporate and take them to a recycling bin once they are dry.
Last-minute spot checks for your engine
Once you are sure every part of the engine is replaced correctly and is well-connected, use a cloth to buff it again and examine every nook and cranny for wet spots. This step is necessary to prevent rusting.
You may then finish your engine cleaning exercise by performing some spot checks to identify worn-out parts and leaks.
While dangerous driving causes many accidents, you’ll find that malfunctioning cars are just as responsible.
Many drivers have to seek the services of expert attorneys, such as car accident lawyers NJ when they cause accidents due to neglecting their vehicle upkeep.
Therefore, in addition to keeping your engine clean, you should perform regular spot checks on it. Here’s how to do it.
- Start by removing the car air filter from its box and holding it up against the sun to check for dirt. If no light is streaming through the filter, use a vacuum cleaner on a gentle setting to suck the dirt out.
- Look through the air filter again, and if you cannot see through it, replace it with a new one. Usually, car air filters are changed after every 20,000 miles of driving or replaced after a year.
- Check your car’s spark plugs, hoses, and belts to ensure they are in excellent condition and replace those that are broken or worn out.
- Finish by checking for fluid leaks from your vehicle by looking at the ground under your car. Any oily drops may signify some sort of leak that you should deal with.
Transmission fluid leaves a red stain, while engine oil leaves a brown to blackish stain. Leaking engine coolant is usually greenish in color.
You should also note that not all fluids will leak to the ground. Many times, you will find them seeping over parts of your engine.
Therefore, check all the engine parts thoroughly after cleaning your engine. If you find any leaks, take your vehicle to the mechanic for repairs.
Otherwise, you may embark on topping up the engine fluids to the correct level.
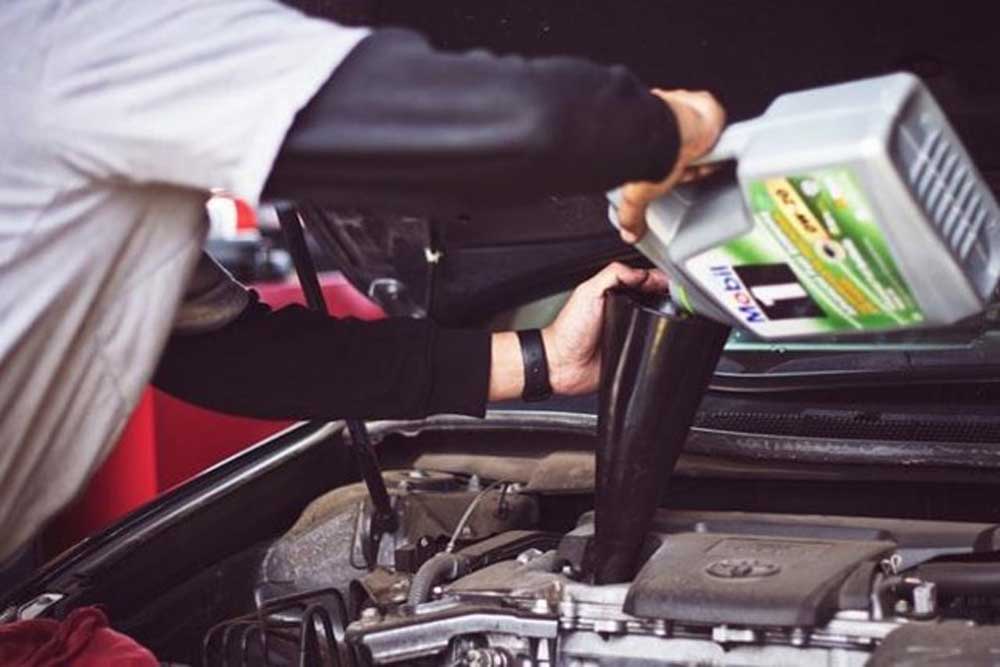
Topping up engine oils and lubricants
Engine oils and lubricants keep your car running smoothly and prevent the wear and tear of its individual parts by reducing friction. Therefore, these oils and lubricants should be light and clean, without debris.
Clean engine oil is yellow or amber in color. If it is thick and dirty, you must replace it with fresh oil.
Manufacturers recommend a car oil change every 7,000 to 10,000 miles for new vehicles. If your car is an old model, you should replace the oil sooner, such as at 3000 miles to 5000 miles.
Always use the dipstick from your engine oil reservoir to check its level and ensure it is close to the maximum indicator on the side of the oil tank. Otherwise, add more engine oil where necessary.
Next, check your car transmission fluid, which is essential for lubricating and cooling the valves, gears, and clutches in your car transmission. You are required to change your vehicle’s transmission fluid every 30,000 miles.
Clean transmission fluid is red or amber in color. If yours is cloudy or dark, take the car to the mechanic for an inspection. They will fix any problem and top up the fluid where necessary.
You should also check the engine coolant (which protects your radiator from overheating) at least once a week or every 50,000 miles and change it if it is sludgy. Otherwise, top it up to a level between the maximum and minimum indicators at the side of the tank.
Another essential car fluid is the power steering fluid. It is responsible for the smooth turning of your steering wheel at any speed. The dipstick in your power steering tank will guide you on whether to increase its level or not. Then, you can finish by taking a look at your brake fluid.
Brake fluid is a translucent fluid that enables you to easily maneuver your brakes. The brake fluid reservoir of your car is located in a see-through canister on the side of the engine bay.
Top your brake fluid up if it is too close to the minimum mark on the reservoir or below it. Otherwise, change it to avoid damaging your brakes if it is a dirty-brownish color.
Last word!
And that’s all. Now you have a clean, gleaming engine that you can be proud of.
Hopefully, after such an engine inspection and tune-up, you will appreciate the look and feel of a clean engine and keep up a regular cleaning and spot check routine.
Your car engine should get a tune-up every 10,000 to 12,000 miles. And if you rarely use your car, you should get it tuned up at least once a year.
If you do not want to keep opening the hood of your car and messing with its engine, adopt habits that do not expose it to unnecessary wear and tear as well as dirt or grime. You may also choose to take it to your auto expert for regular maintenance.
Author : Monna Halley